

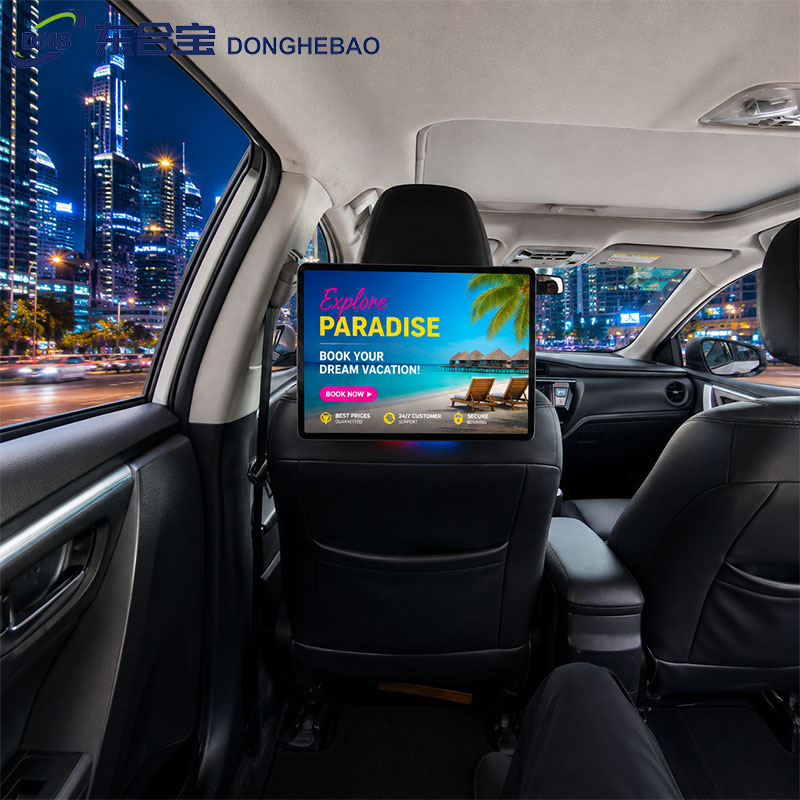
This article explains how to upgrade the firmware of the DHB-T80 taxi rear seat display using a USB flash drive.
The firmware upgrade method described in this guide is only applicable to the DHB-T80 solution. Please do not use these firmware files or upgrade instructions on other DHB models or hardware solutions.
Before starting the upgrade, make sure that the firmware package provided by the DHB team is specifically intended for your taxi rear seat display device.
Upgrade Steps and Instructions
Step 1: Prepare a USB Flash Drive
Prepare a USB flash drive with a capacity of no more than 64GB.
Make sure the USB flash drive can be recognized normally by your computer.
Step 2: Copy the Two Firmware Files
Insert the USB flash drive into your computer.
Copy the two firmware upgrade files provided by the DHB team from your computer to the root directory of the USB flash drive.
The two files must be placed directly in the root directory.
Do not create a folder for the firmware files.
Step 3: Rename the Firmware Files
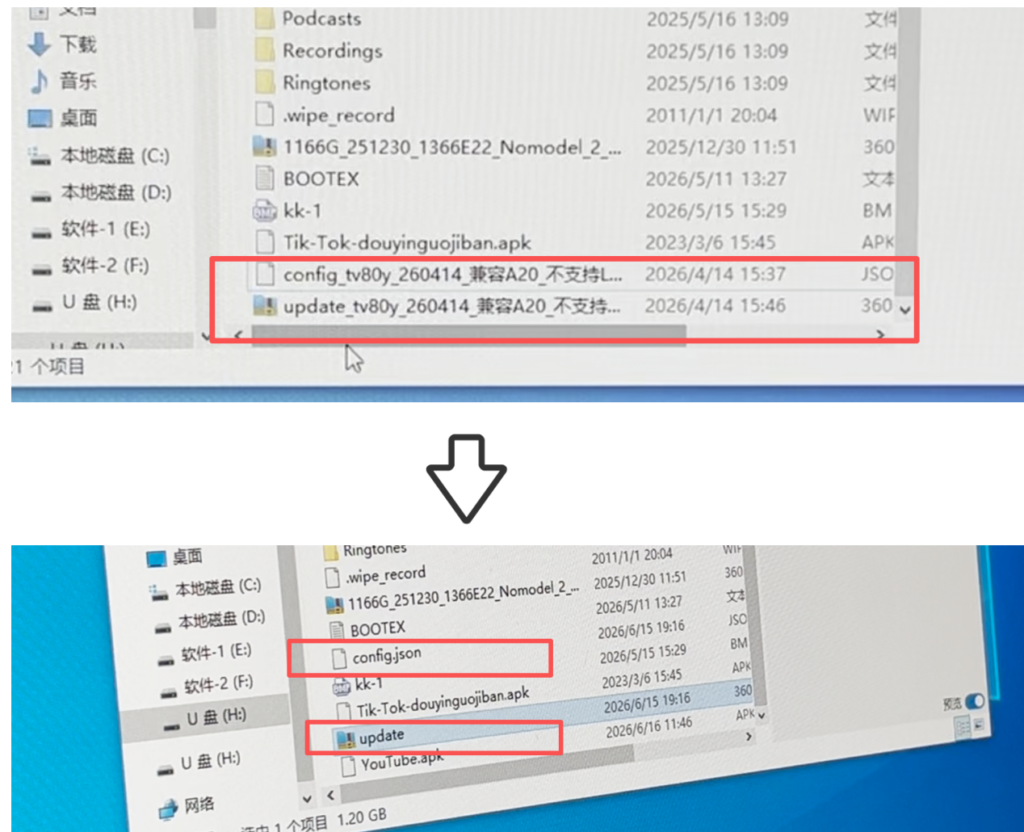
After copying the two firmware files to the USB flash drive, rename them as follows.
Firmware File
Change the file name:
For example:update_tv80y_260615_800x1280_SDV_gen
to:
update
Do not decompress or extract this file.
Configuration File
Change the file name:
For example:config.tv80y_260615_800x1280_SDV_gen
to:
config.json
Important File-Renaming Notice
Do not change the file format. Only modify the text before the file extension ..
The final file names should be:
updateconfig.json
Please refer to the provided image and video demonstration for the correct file-renaming method.
Step 4: Connect the USB Flash Drive to the taxi rear seat display
After preparing the USB flash drive, insert it into the Type-C socket of the DHB-T80 taxi rear seat display using the supplied adapter cable.
After connecting the USB flash drive, no additional operation is required.
The system will automatically detect the firmware files and start the upgrade process.
Step 5: Wait for the Firmware Upgrade
The upgrade process takes approximately 15–20 minutes.
During the entire upgrade process:
- Do not unplug the USB flash drive.
- Do not disconnect the power supply.
- Do not power off the machine.
- Do not perform other operations on the device.
Important: If the upgrade process is interrupted, the machine may become locked. Please ensure that the taxi rear seat display has a stable power supply throughout the entire upgrade process.
Step 6: Check the Upgrade Result
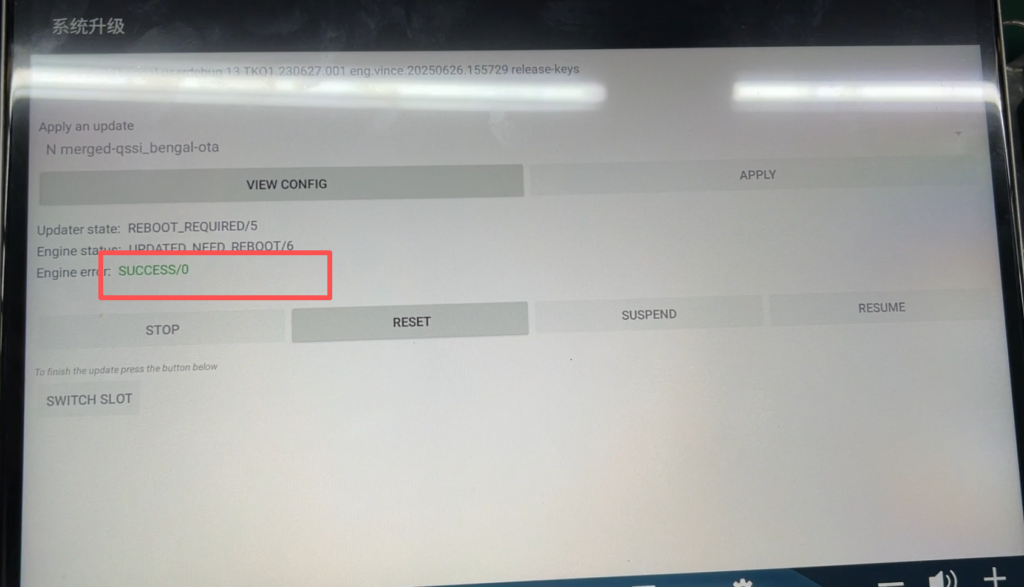
When the upgrade has been successfully completed, a green “Success” message will appear on the screen.
The green “Success” message indicates that the firmware upgrade is complete.
After seeing the “Success” message:
- Remove the USB flash drive.
- The taxi rear seat display will automatically restart.
- Wait for the system to boot normally.
The firmware upgrade is now complete.
Taxi rear seat display Firmware Upgrade Process
The complete upgrade process is:
Prepare USB → Copy two firmware files → Place files in the root directory → Rename the files → Connect USB to the Type-C port → Automatic upgrade → Wait 15–20 minutes → Check “Success” → Remove USB → Automatic restart
Important Precautions
Before upgrading the DHB-T80 taxi rear seat display, carefully check the following:
- Applicable solution: This upgrade method is only for the DHB-T80 solution.
- Firmware compatibility: Only use firmware provided or confirmed by the DHB team for the DHB-T80.
- USB capacity: Use a USB flash drive of 64GB or less.
- File location: Both firmware files must be placed directly in the USB root directory.
- Do not decompress: Do not extract or decompress the
updatefirmware file. - File names: The final file names must be
updateandconfig.json. - Do not change the format: Only modify the required file name, not the file format.
- Stable power: Do not disconnect the power supply during the upgrade.
- Do not remove USB: Keep the USB flash drive connected until the green “Success” message appears.
Firmware Upgrade Video Demonstration
DHB provides a video demonstration of the DHB-T80 taxi rear seat display firmware upgrade process.
The video shows the key steps, including:
- Preparing the USB flash drive
- Copying the firmware files
- Renaming the firmware files
- Connecting the USB flash drive to the DHB-T80
- Starting the automatic upgrade
- Confirming the green “Success” message
We recommend watching the video together with this guide before performing the firmware upgrade.
FAQ
1. Which DHB device is this firmware upgrade method for?
This firmware upgrade method is only applicable to the DHB-T80 solution.
2. Can I use these firmware files on another DHB model?
No. Do not use the DHB-T80 firmware package on other DHB models or hardware solutions. Please contact the DHB team to confirm firmware compatibility before upgrading.
3. What size USB flash drive should I use?
Use a USB flash drive with a capacity of 64GB or less.
4. Where should I place the firmware files?
Both firmware files must be placed directly in the root directory of the USB flash drive.
5. Should I decompress the update file?
No. Do not decompress or extract the file.
6. How long does the DHB-T80 firmware upgrade take?
The upgrade process takes approximately 15–20 minutes.
7. What does the green “Success” message mean?
The green “Success” message indicates that the firmware upgrade has been completed successfully.
8. Can I turn off the DHB-T80 during the upgrade?
No. Do not power off the machine or disconnect the power supply during the upgrade. Interrupting the upgrade process may cause the machine to become locked.
Contact DHB
If you need the DHB-T80 firmware package or technical support for your taxi rear seat display, please contact the DHB team before starting the upgrade.
WhatsApp: +8613422871594
Email: kiki@donghebao.com
website:www.dhbtaxiad,com
Contact Us